Check this out.

Saturday, October 23, 2010

Devil's Kiss


Tube of choice. I am using Sympathy for the Devil found HERE
Scrap Kit is Forbidden Love found HERE
Mask by Vix 72 found HERE

Open a new blank canvas 600 x 600.
C/N/P paper 3 as a new layer and apply your mask. Merge group and duplicate twice for a total of 3 mask layers. Merge all three.
C/N/P Frame 7 as a new layer and resize 90% making sure all layers is deselcted.
C/N/P Raster 4 of your tube as a new layer and position behind your frame layer. Hide your mask layer. Make your tube layer active and position the woman inside of the first frame, hide the tube layer. Make your frame layer active and with your magic wand select inside of the first frame, selections, modify, expand by 3, invert. Make your tube layer active once more and hit delete, selections, none. Now you will repeat the frame steps with the next two frames and a different selection of the tube.
C/N/P Moon as new layer, resize 50% and position as shown.
C/N/P Tree as new layer and position as shown, duplicate and mirror.
C/N/P Rose as new layer, resize 30% and position in bottom left of center frame, duplicate and mirror.
C/N/P Begonia as a new layer and resize 15% position in top left corner of first frame as shown, duplicate, mirror.
C/N/P Sparkles as new layer and position towards the bottom of the frame behind the rose layer.
C/N/P Candle 2 as new layer and resize 30% position as shown.
ADD ALL © INFO and any other saying you wish.


Friday, September 24, 2010

Autumn Bliss


SUPPLIES NEEDED
PSP
PLUGINS: XERO-BAD DREAM AND ALIEN SKIN
SCRAP KIT: FALL INTO ME BY MYSTICAL ILLUSIONZ FOUND HERE
MASK 60 BY WEESCOTSLASS FOUND  HERE
TUBE OF CHOICE. I AM USING THIS BEAUTIFUL PIECE FROM UNHOLY VAULT DESIGNS FOUND AT MPT. CLICK THE IMAGE AND IT SHOULD TAKE YOU THERE.
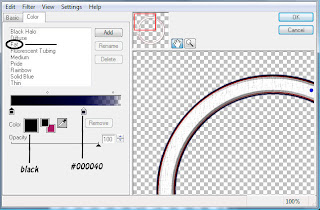
Open a blank canvas 600 x 600. C//N/P paper 3 as a new layer. Layers and then load your mask 60 from image or disk. Merge group and add xero, bad dream with the following settings:
Paste your square frame as a new layer and resize by 65% making sure that the all layer box is deselected. Hide your mask layer and make your frame layer active. With your magic wand select inside the frame and add a new raster layer. Selections, modify, expand by 8 and paste your paper 13 into selection, select none. Position your paper behind your frame and then make your frame layer active and add a drop shadow to your liking. I used 0,0,100,11.
Copy and paste your close-up as a new layer and position as shown.
 Now add a drop shadow to your liking(I am using the same as before).
Duplicate your tube layer and position one below the frame and one above. With your top tube layer turned off make your bottom tube layer active and erase her left arm and bottom so it is behind the frame. Repeat this step on the top tube layer.
Copy and paste your sparklestars as a new layer and position as top layer. Position at bottom of frame as shown.
Copy and paste your ray of light as a new layer and position behind the frame and to your liking. Erase all of the light that comes out from behind the frame.
Copy and paste real butterfly as new layer and resize 55%. Make sure all layers is deselected.
Free rotate the butterfly layer to the left 25% and add a drop shadow.
Now you can choose what leaves you would like to use or you can use 2,4,5 like I did. Copy and paste each leaf and resize each 15% add a drop shadow and position as shown.
Copy and paste gerber as new layer, add drop shadow, resize 15%, position as shown.
Copy and paste doodle as a new layer and position in the corner as shown and as the bottom layer. Add a drop shadow.
Add © and any wording you would like and save. :)


Friday, September 17, 2010

Tainted Love


SUPPLIES NEEDED

PSP XI
PLUGINS : Eye Candy 4000
SCRAP KIT : Tainted Love by Mystical Illusionz found HERE
MASK : 43 by Urban Fairytales found HERE
TUBE OF CHOICE OR ELIAS ;) I am using
 If you choose to use a different tube it will be best if it has a close up as well.  

1. Open new blank canvas 600 x 600
2. Selections - select all - paste MIZ_pp11 into selection - select none
3. Layers - new mask layer - from image UFMask43 with source luminance selected - merge group - rename this layer MASK and hide.
4. Copy and Paste (AKA C-N-P or C/N/P) MIZ_stampframe2 as a new layer - resize 65% and make sure all layers is deselected - rename this layer FRAME.
 5. With your magic wand tool hold down Alt and select the inside of each frame (make sure feather is set to 0) - Selections - Modify - expand 5.
6. Add a new raster layer and  C/N/P MIZ_pp8 into selection - select none and position the paper layer behind your frame.
7. Make your frame layer active - Effect - Plugins - Eye Candy 4000 - Gradient Glow with the following setting : 
8. Now this is where a working knowledge of psp or even better ... the ability to read my mind comes in. 
C/N/P Layer 1 of your tube or the close up of the tube you selected as a new layer - position behind the FRAME layer and above the paper so it has a certain part of the body that you wish inside that frame. Here let me post a pic lol so you have some kinda idea about my ramblings. 
 9. Hide the tube layer and make your frame layer active. With your magic wand select inside your frame - selections - modify - expand 5 - selections - invert - make your tube active again - delete - selections none.
10. Repeat with the right frame and a different body part.
11. C/N/P Raster 1 of your tube and position as shown.
12. Add a drop shadow with the following settings 
0;0;100;3;black
 13. Now duplicate that layer and position one layer above the frame and one below - eraser tool - erase her right foot on the top tube layer. You should have it looking like this : 
 14. Now you can make your MASK layer visible if you would like. C/N//P MIZ_rayoflight as a new layer and position at the very top center of your canvas. This ray should be the second layer. Your layers should be lined up like this.
15. C/N/P MIZ_lightfantasy as a new layer and position this behind your left frame layer or behind all but the pink paper layer.
16. C/N/P MIZ_diamondrain as a new layer and position behind all but MASK layer.
17. C/N/P MIZ_girlyskul2 as a new layer - position above FRAME and resize skull 25% - image - free rotate 20 right (make sure all layers is deselected) - gradient glow with the same settings as before.

Add any txt you wish but please make sure you add all © info.


Monday, September 6, 2010

Witchy Woman

SCRAP KIT : The Witching Hour
TEMPLATE : Bat Wing Soup
TUBES OF YOUR CHOICE. I USED THE BEAUTIFUL WORK OF : BARBARA JENSEN
PSP XI
PLUGINS EYE CANDY 4000


  1. Open your Wing Bat Soup template.
  2. Delete you © info.
  3. Make your orange shape top layer active - selections - all - float - modify - expand 1.
  4. C-N-P PP11 as a new layer - invert - with your paper layer active - delete -selections none - merge down.
  5. Repeat steps 1-4 on layers orange shape bottom and large orange rectangle.
  6. Make your bat layer active - image - mirror - flip  - resize - 60 % making sure all layers is deselected - resize by 60 once more.
  7. Duplicate your bat layer twice so you have a total of 3 bats. :)
  8. Position your bats to your liking or like mine - merge all three down.
  9. Effects - plugind - eye candy 4000 - gradient glow with the following settings :

10. Make your White shape outline layer active - selections - all - float - expand 1 - flood fill with a Halloweenie looking gradient or really any color you think looks good. :P 
11. Make your middle white circle layer active - selections - select all - float - defloat - modify - expand.
12. C-N-P PP3 into selection - select none.
13. Repeat steps 11 and 12 to the last two white circle layers.
14. Adjust - add/remove noise to all three circle layers with the following settings.

15. Add a gradient glow to all three circles with the same settings as before.
16. Make your white rectangle layer active - selections -select all - float - defloat - modify - expand 1 and flood-fill with #6a190a - selections - select none - gradient glow as before.
17. Repeat step 16 with your white stripe layer and with the color #e37626.
18. Duplicate pixel word art and position on the right side as shown in mine.
19. Paste you tube of choice as new layer and position as shown.
20. With your second tube c/n/p as a new layer and position to your liking behind the orange rings. 
21. Make your orange circle layer active - selections - select all - float - defloat - invert.
22. Make your tube layer active ( tube behind the ring) carefully erase around the orange ring. 
23. Repeat this step to the other two rings and with a different body piece.
24. Change the circle tube layers blend mode to hard light.
25. With your crop tool crop around the entire canvas.
26. C/N/P WP_WH_PANSY as new layer and resize 65% and position as shown.
27. C/N/P WP_WH_PASIGN as new layer - gradient glow with same settings - position as show.
28. C/N/P WP_WH_CAULDRON as new layer - resize 50% and position as shown - add a drop shadow. I used black 0 and 0.
29. C/N/P WP_WH_FLAMINGGHOST as new layer and position behind the 3 circle layers as shown .
30. C/N/P WP_WH_PNG as new layer and resize 30% -drop shadow - mirror - position as shown.
31. C/N/P WP_WH_spiderweb as new layer and resize 50 position as shown - duplicate - position one layer as the  very top layer and one layer behind your White shape outline layer. With your eraser tool erase outside of your outline layer on both web layers.
32. ADD © INFO  and any other text you wish.
Delete backgound layer if you wish.


Thursday, July 22, 2010

Shiver Me Timbers


I am using PSP 11 and Animation Shop 
This tutorial uses a group permission tube. Please substitute if you are not a member of Shewolf's Domain.
Scrap Kit: Buried Treasure by Wicked Princess.
Template Flirting by Dee found HERE
Plugins: Eye Candy 4000 Gradient Glow.

Open template - Shift + D - Close original - Image - Resize 450 x 450 all layers selected - Image 
- Canvas size - Resize 550 x 550 - Flood-fill background white - Delete template © layer, bottom square frame, bottom square background, top square frame, top square background, word art, and disaster top layer - Now merge your top black square to your bottom black square - selections - Select all - Float - Defloat - Modify - Expand 2 - C/N/P paper 18 into selection - Selections - Select none - Effects - Eye Candy Gradient Glow with the following settings:


Make your large white circle active - Selections - Select all - Float - Defloat - Flood-Fill tool.

Ok now I am using a preset gradient and I have no idea where I got it from so I will give you the colors or you can just pick some you like ;)

#f6dc7f
#c58e33
#d69c3b
#624533
#aa5b32
#f5e7a0
#ab7508
#be7339
#4e1c01


Adjust - Add/Remove noise : Gaussian, 100, monochrome - select none - Merge your promoted layer with you white circle layer - Make your grey stripe background layer active - Selections - Select all - Float - Defloat - C/N/P paper 7 into selection - Select none - Gradient Glow same settings as before - Make your pink dotted layer active - Selections - Select all - Float - Defloat - color in #873d1d - Select none - Gradient Glow - Gradient Glow - C/N/P tube as new layer and position behind/inside your black circle frame - C/N/P Coin splatter as new layer and resize 90% all layers deselected - C/N/P Coins as new layer - Resize 30% and position as shown - Add a drop-shadow to your liking - C/N/P crumple as new layer and position behind all layers except white background - C/N/P barrel as new layer - Resize 50% and position as shown - drop shadow - C/N/P pitcher as new layer and resize 30% - Position as shown - Duplicate - Position as shown - drop shadow - C/N/P Scrolla as new layer and resize 30% - apply name as shown - Make you disaster top layer and disaster bottom layer visible - Make your top layer active - Selections - Select all - Float - Defloat

Add all © info. 

If you wish to animate continue. 

Hide Raster 9 layer or Name layer, Coin Splatter, Crumple and Background - Merge Visible - Duplicate coin splatter 2 times for a total of 3 - top coin layer add noise 50, monochrome, Gaussian - layer 2 active add noise same as before but 40 - repeat on 3 but with 30 - Hide layer 2 and 3 and copy merge - paste as  new image into animation shop - Hide layer 1 and 3 and copy merge - paste after current image in animation shop - Hide layer 1 and 2 and copy merge - paste after current image in animation shop. Save


Friday, July 16, 2010

HellaCute


SUPPLIES

Kit: Happy Colors P&A Dezigns found HERE
Template 122 by Denz Designz found HERE
Tube of Choice. I am using the art of PinUp Toons found HERE
Font: Vinyl Sawtooth ITC TT
Plugins: Eye Candy 4000 Gradient Glow

Open you template and delete your © layer, hot hot hot layer, #1 Baby layer, and the small hot hot hot layer.

Make your purple rectangle shape layer active - selections -select all - float - defloat - selections - modify - expand - 1 - c/n/p paper 6 into selections - select none.

Make your frame back 1 layer active - selections -select all - float - defloat - c/n/p paper tjackson4 into selections - select none. 

Make your frame back 2 layer active - selections -select all - float - defloat - c/n/p paper tjackson4 into selections - select none.

Make your frame 1 layer active - selections -select all - float - defloat - selections - modify - expand - 1 - flood-fill #8a984e - selections none.

Make your frame 2 layer active - selections -select all - float - defloat - selections - modify - expand - 1 - flood-fill #359594 - selections none.

 Apply gradient glow to both frame layers with the following settings : 


Both colors should be set to black.

Make your dotted lines layer active - selections -select all - float - defloat - selections - modify - expand - 1 - c/n/p Paper4 into selection - selection none.

Add gradient glow with the same settings as before.

Merge star 1,2,3 down - selections - select all -float - c/n/p tjackson3 paper as new layer - selections - invert - make tjackson3 layer active and delte - select none - with your crop tool select all the way around tag and crop to get rid of any extra from the paper layer - adjust - add/remove noise with the following settings : 


Repeat this step - merge raster layer down to the star layer - gradient glow but change the colors to #efb703 - repeat the glow but change the colors to black.


Now go back to your purple rectangle shape layer active and add the same black gradient glow as before.

C/N/P string 1 as new layer and position over black strip - with your pick tool selected - adjust this layer so it is the same width as the black strip layer and then push the bottom of the pink ribbon up so that it is inside the tag - gradient glow.


 C/N/P Raster 2 of your tube as new layer and position over frame back 2 - make frame back active - selections - float - defloat - invert - make tube layer active delete - position behind the frame layer.

C/N/P Raster 2 of your tube as new layer mirror and position over frame back 1 - make frame back active - selections - float - defloat - invert - make tube layer active delete - position behind the frame layer - selection none.

C/N/P Hearts3 as new layer - resze 50% and make sure all layers is deselcted - gradient glow - position in top right as shown.

C/N/P Raster 1 of tube as new layer - gradient glow - position as shown.

C/N/P Butterfly 1 as new layer and resize 30% - position as shown. 

C/N/P Eyelet2 as new layer and resize 65% - gradient glow - position behind all layers except the purple rectangle.

C/N/P Dragonfly1 as new layer and resize 30% gradient glow and position as shown.

C/N/P Sunglasses1 as new layer and resize 30% - free rotate, left, 30, rotate single layer selected - gradient glow - position as shown. 

C/N/P StringBow1 as new layer - gradient glow - position behind all layers as shown.

Add © and any other txt. Save.


Wednesday, July 7, 2010

Garden Delite


SUPPLIES
Template 25 by AquaRebel
Scrap Kit: Mama's Garden by Wicked Princess which you can find HERE
Eye Candy 4000 Gradient Glow
Eye Candy 5 Impact Perspective Shadow
Tube of choice. I am using PinUp Toons found HERE

Open template and delete © - Arrange your layers in the following order:

6
7
8
1,2,3 and mere these 3 down - rename S1
5
4
9,10 and merge down - rename S2

Make layer S1 active - selections - select all - float - defloat - modify - expand - 2 - c-n-p paper 11 into selections - select none.

Make S2 active - selections - select all - float - defloat - modify - expand -2 - c-n-p paper 9 into selection.

Make raster 4 layer active - selections - select all - float - defloat - modify - expand -2 - c-n-p paper17 into selection - select none.

Now make layer S1 active - effects - plugins - EC 4000 Gradient Glow with the following setting:


Apply this setting to raster 4 as well.

C-N-P arch as a new layer - resize 90%  - position all the way to the left - duplicate - position one copy as your very first layer and the second copy as your bottom layer. (Above the background though) - with your eraser tool erase all of the right side on the top layer.

C-N-P tube as new layer - mirror - resize 70% - effects - plugins - Eye Candy 5 Impact Perspective Shadow - default settings.

C-N-P Hibiscus as new layer - resize 30% - duplicate 3 so there is a total of 4 and position around the back of her as shown.

Repeat with WP_MG_HEARTDANGLE - gradient glow 

Make raster 5 active - selections - select all - float - defloat - with your paint brush color all of this black - select none. 

Add © and all txt.


Tuesday, July 6, 2010

Sweet as Honey


Scrap Kit: Honey be Mine by Wicked Princess found HERE
BK Mask 18 created by Butterfly Kisses which can be found HERE Set 4
Eye Candy 5 Impact Perspective Shadow
Eye Candy 4000 Gradient Glow
Tube of choice. I am using the art of Jorge Packer. Now I am not sure if this image is general permission or group permission but HERE is the link to one of my fav. groups and also where I received it from.


Open new image 600x600
Selections - select all - cnp paper 18 as a new layer - select none
Layers - New mask layer - from image - BK_Mask18 - merge group.
Image - resize - 90% and make sure that all layers is deselected.
Effects - plugins - eye candy 4000 - gradient glow with the following settings.
#eeda77

Repeat this step but change both colors to black.

C-N-P heart frame as new layer and add the same gradient glow - hide all layer but your frame - magic wand tool and select inside the frame - selections - modify - expand - 6 - new raster layer - c-n-p tube into selection position behind frame.
C-N-P Double heart  bow as new layer - resize 50% and position in bottom right corner with the same black gradient glow.
C-N-P flower spray and resize 50% - adjust - add/remove noise with the following settings :


Gradient glow - black.

C-N-P side view bee and resize 25% - gradient glow and duplicate 2 more times for a total of 3 - position as shown.

C-N-P WP_HBM_BEARBEESITTING as a new layer - resize 50% - gradient glow - mirror and position as show - Impact - shadow with the following settings :


Add all @ and txt. Save.


Tuesday, June 29, 2010

A Moment in Time


Scrap Kit : Thoughts of Love. This beautiful kit by ScrappinDsigns can be found HERE
Tube of Choice : I am using the beautiful work of Anna Marine which you can find HERE
Mask 38 found HERE
Plugins : Eye Candy 4000 Gradient Glow and Alien Skin Xenofex 2 Constellation.
Open new blank canvas 500 x 500 - flood-fill white.
C-N-P Paper 16 as new layer - New mask layer - from image -WSL_Mask_38 - Merge group.
C-N-P flower heart frame as new layer and resize 60 % - all layer deselected - move towards the bottom just a smidge.
C-N-P tube as new layer and resize 90 % - add a drop shadow to your liking -Position in center of frame - duplicate - position one below the frame and one above - erase the tube of both layers on the bottom half only so it positions her bottom half on the inside of the frame and her top half outside.
C-N-P tol light as a new layer - resize 50 % and position as shown - add gradient glow w/ the following settings. 

C-N-P tol_divider as new layer - resize 50% and position to the right as shown - Move behind all layers except mask layer - duplicate - flip - gradient glow
C-N-P tol_clock as new layer - resize 50% - position in top left corner behind all layer except mask gradient glow x2.
C-N-P tol_key as new layer - resize 50% - mirror and position as shown - gradient glow x3.
C-N-P pearl jewel as new layer and resize 10% - on this you can duplicate and position as shown or however many you like - gradient glow.
C-N-P tol_beads as new layer and resize 50% - position on the right as shown (behind all but mask) - duplicate - mirror - flip.
C-N-P curtain as new layer and resize 50% - position as shown. 
Add name or txt and all ©


Sunday, June 20, 2010

Harmony


SUPPLIES

Scrap Kit : Vantage Angel
Tube of Choice. I am using the beautiful work of Renee Biertempfel. Now I went through and tried to find this tube and couldn't find it. I am thinking her Ilana tube would also look nice.
Plugins : Eye Cany 4000 Gradient Glow and Xenofex 2 Constellation 
Animation Shop
Font : Tapioca
Open a new blank canvas 530 x 530 
Selections - select all - c-n-p paper 13 into selection - select none.
Layers - new mask layer - from image -Vix Mask 396 - Merge group - duplicate 2 times so you have a total of 3 mask layers - merge down - name this layer mask.
C-N-P tube as new layer and position in middle of canvas - add drop shadow : 0,0, 100, 10, black - repeat drop shadow.
C-N-P Rose 1 as new layer - resize 70% and position in bottom right corner - 
drop shadow : 0,0, 100, 10, black
Duplicate - merge down - rename this layer rose 1 - duplicate - flip - rename rose 2 -- make rose 1 active - duplicate - mirror - rename rose 3 - merge all three roses down and position behind tube layer.
C-N-P lisetescrap_painted flowers CU (1) as new layer and position behind roses.

C-N-P Butterfly 7 as new layer - resize 30% - free rotate 55 : right - Eye Candy Gradient Glow with the following setting : 


Add © and txt

If you wish to animate your tag please continue

Make your mask layer active - duplicate 3 times - rename these layers 1, 2, and 3.
On 1 add Constellation with the following settings :


Hide 1 - Make 2 active - Repeat this step on the next 2 layers but hit random seed each time.
Duplicate your white rose layer once - add constellation - merge down
Now hide layer 2 and 3 - copy merged - paste into AS.
Back in PSP hide layer 1 and make layer 2 visible - AS paste after current frame - repeat with layer 3
Save


Inked Beauty


Tube of choice. I am using the art of PinUp Toons
Plugins : Gradient Glow Eye Candy 4000
Mask : Vix Mask 333
Font : Tattoo Ink
Open new blank canvas 600 x 600
Selections - select all - c-n-p paper 22 into selection - select none 
Layers - new mask layer - from image - Vix_Mask 333 - merge group - 

EC Gradient Glow : 
COLOR - Fat - both colors set to black 
BASIC - width 3.00, soft 25, opacity 100, select draw only outside selection

Duplicate your mask layer and merge down - adjust - add noise : 60, Gaussian, Monochrome- duplicate this layer again - merge down - with your selection tool position your mask layer in the top left corner.
Duplicate this layer - mirror - flip - merge your 2 mask layers down - Rename this layer Mask
C-N-P Bling bracket as new layer - gradient glow same settings - Rename this layer as Mask
Hide your mask layer - magic wand - select inside the frame - selections - modify - expand 6 - new raster layer - c-n-p paper 23 into selection - position behind frame - selections none.
C-N-P your tube as new layer and position on the right and behind frame as shown.


Now with your eraser tool clean up the tube layer outside of the frame and change the blend mode to luminance - merge down.
With your crop tool crop select the entire canvas and crop getting rid of the extra tube layer.
Now c-n-p your tube again - keep its position -duplicate - gradient glow. Keep one layer beneath the frame and position one on top of the frame. With your eraser tool and your top tube layer selected erase the bottom part of the tube so the frame is visible - Make your bottom tube layer active and erase the bottom part of the tube that is on the outside of the frame.Now merge your top tube layer, frame, bottom tube layer, and paper down.


C-N-P splatter as new layer and resize 80% position in the empty area of the right corner - position the splatter layer beneath the frame layer.
C-N-P Rope as new layer - resize 60 and position at the  bottom of the frame and position beneath the frame layer. 
C-N-P cat as new layer and resize 40% position in bottom left corner as top layer and gradient glow.
C-N-P Screw as new layer and position as shown.

Gradient glow - duplicate - mirror.
Duplicate the screw layer and free rotate 90 to the left and position at the bottom, center of the frame - erase the top screw. 
C-N-P Blade as new layer - resize 25% - free rotate - 20 : right
Add all © and text.

Merge all layers visible

Wednesday, June 16, 2010

Americana


Scrap Kit : Americana by the talented Kittie
Tag of choice. I am using the beautiful work of Keith Garvey  Sparkle
Plugins : Eye Candy 4000 Gradient Glow
Mask : 396 by VIX

Open new image 600x600
Selections - select all
C-N-P paper 7 into selection - select none
Layers - new mask layer - from image - Vix 396
Make Mask Raster 1 layer active and merge group.
New Raster layer - Flood-Fill white and position behind mask.
C-N-P Frame 4 as new layer - Plugins - Eye Candy 4000 Gradient Glow with the following settings 

Glow Width : 3.00
Soft Corners : 25
Overall Opacity : 100
Draw only outside selection deselected.

C-N-P your tube as a new layer and position in canter of tag. I lined the top of her hat up with the top of the blue loop - Effects - 3D effect - Drop shadow 


 duplicate - position one tube on top of frame and one below. Now lets name these layers so we don't get all confused.

Top Layer =  T1
Next Layer = Frame
Next = T2
Next = Mask
Next = White

Now with your T1 selected and your eraser tube erase the bottom part of her legs  - repeat on the T2 
With your eraser tube selected and you Mask layer selected erase inside of your frame.
C-N-P Star Dangle 1 as new layer and position behind frame - duplicate - flip - merge down - erase Dangles around the frame - add gradient glow
C-N-P flower 1 as new layer and resize 20% - repeat this with flower 2 and 3 and position as shown - merge 3 flowers down and and gradient glow.
C-N-P Dragonfly 2 as a new layer and resize 50% - position as shown - drop shadow.
C-N-P Tag as new layer - position as shown - gradient glow.
C-N-P Word Art 2 as new layer and position as shown.
Add ©